This is an old revision of the document!
Table of Contents
Magnetic markers
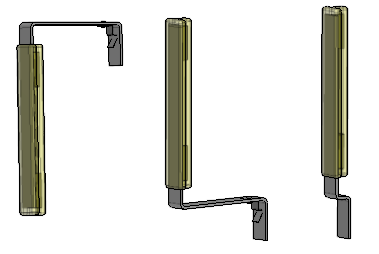
The cleaning process requires magnetic position markers. These position markers (which can be S or U shaped) are placed in a brackets, mounted on the house equipment before the cleaning process takes place. The robot reaches the markers during the cleaning process and position information is transferred to the computer. Different shapes of the markers are necessary depending on the width of the aisle and height of the walls in the aisle (see table below).
More information on how to use the markers can be found via this link.
Types
| MAGNETIC MARKER TYPES | PART NO | DxWxH [mm] | AISLE WIDTH | AISLE WALL HEIGHT | DESCRIPTION |
| EVO marker S form short | 32026 | 25×25×250 | 80 cm or narrower | 74 cm or lower | Installed standing in bracket where aisle width is limited. |
| EVO marker S form | 32030 | 130×25×250 | 81 cm or wider | 74 cm or lower | Installed standing in bracket. |
| EVO marker U form | 32040 | 130×25×210 | 81 cm or wider | 75 cm or higher | Installed hanging in bracket. |
| FITTINGS | |||||
| Marker bracket | 30000 | 1.5x58x58 | Mounted permanently with screws or clamps in the aisle. | ||
| Tube clamp 35 mm | 30010 | Ø35 | For simple mounting of the marker brackets if there are usable pipes in the interior. | ||
| Tube clamp 45 mm | 30020 | Ø45 | For simple mounting of the marker brackets if there are usable pipes in the interior. |

EVO marker U form, S form and S form short.
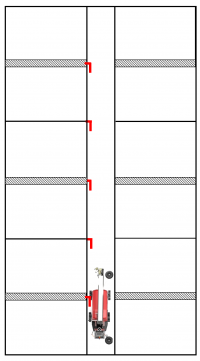
Marker placement examples
Finishers/Weaning
Place a marker at every dividing wall. The pen (both right and left side) after the marker are associated with the marker, generally speaking.

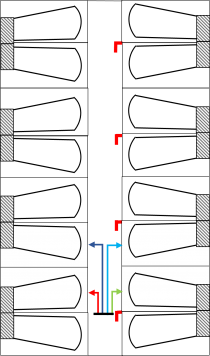
Farrowing
Place one marker at every second dividing wall (if you have mirror flipped pens like the example below). The two pens (on right and left side) after the marker are associated with the marker, generally speaking.

