Table of Contents
Wall program
This instruction gives you the basics of the washing patterns we want you to apply in your wall programs. This is partly for the robot to wash as efficiently as possible but also for the wash to be ergonomic to the robot itself.
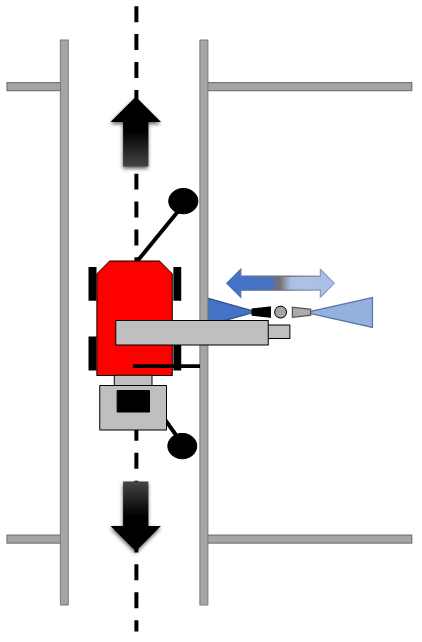
Before jumping into the instruction below, you should know about the robots movements (joystick) and parking positions.
If you need more basic information and understanding regarding programming, you can find it here.
If you want guidance on how to press on the screen, you can find it here.
General information
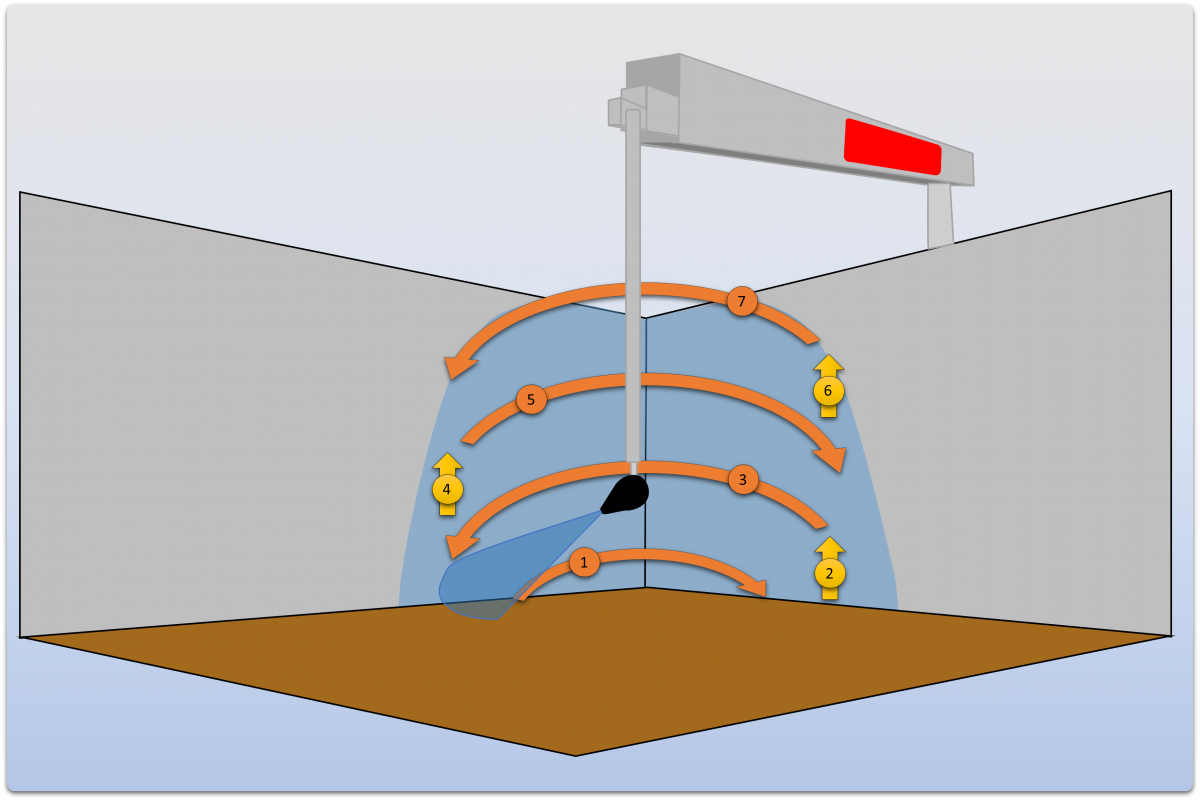
Some motions are more demanding for the robot than others. The fact that a motion is demanding means greater strain on the electric motor but also greater power consumption, which leads to higher battery consumption.
The movements we count as heavy are a lot of boom up- and down. The further out the telescope is, the heavier it gets for the boom motor. Another demanding motion is to run the telescope out when the boom is in an upward position or generally long movements with the telescope.
Do not turn the tower sideways when water/nozzle is sideways. The water pressure that comes out from the nozzle effects the tower motor which could lead to alarm.
Therefore, it is important that you use our principles as basics during programming to get the full potential of the robot with the least possible wear.
 Always have good margins to the interior of the pen with every part of the robot.
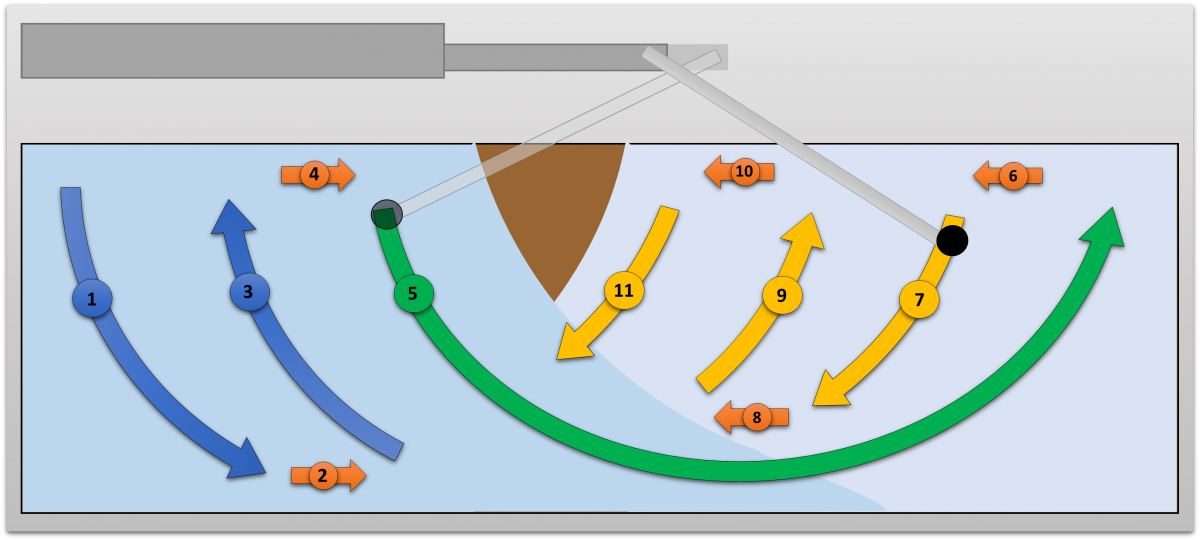
The washing patterns
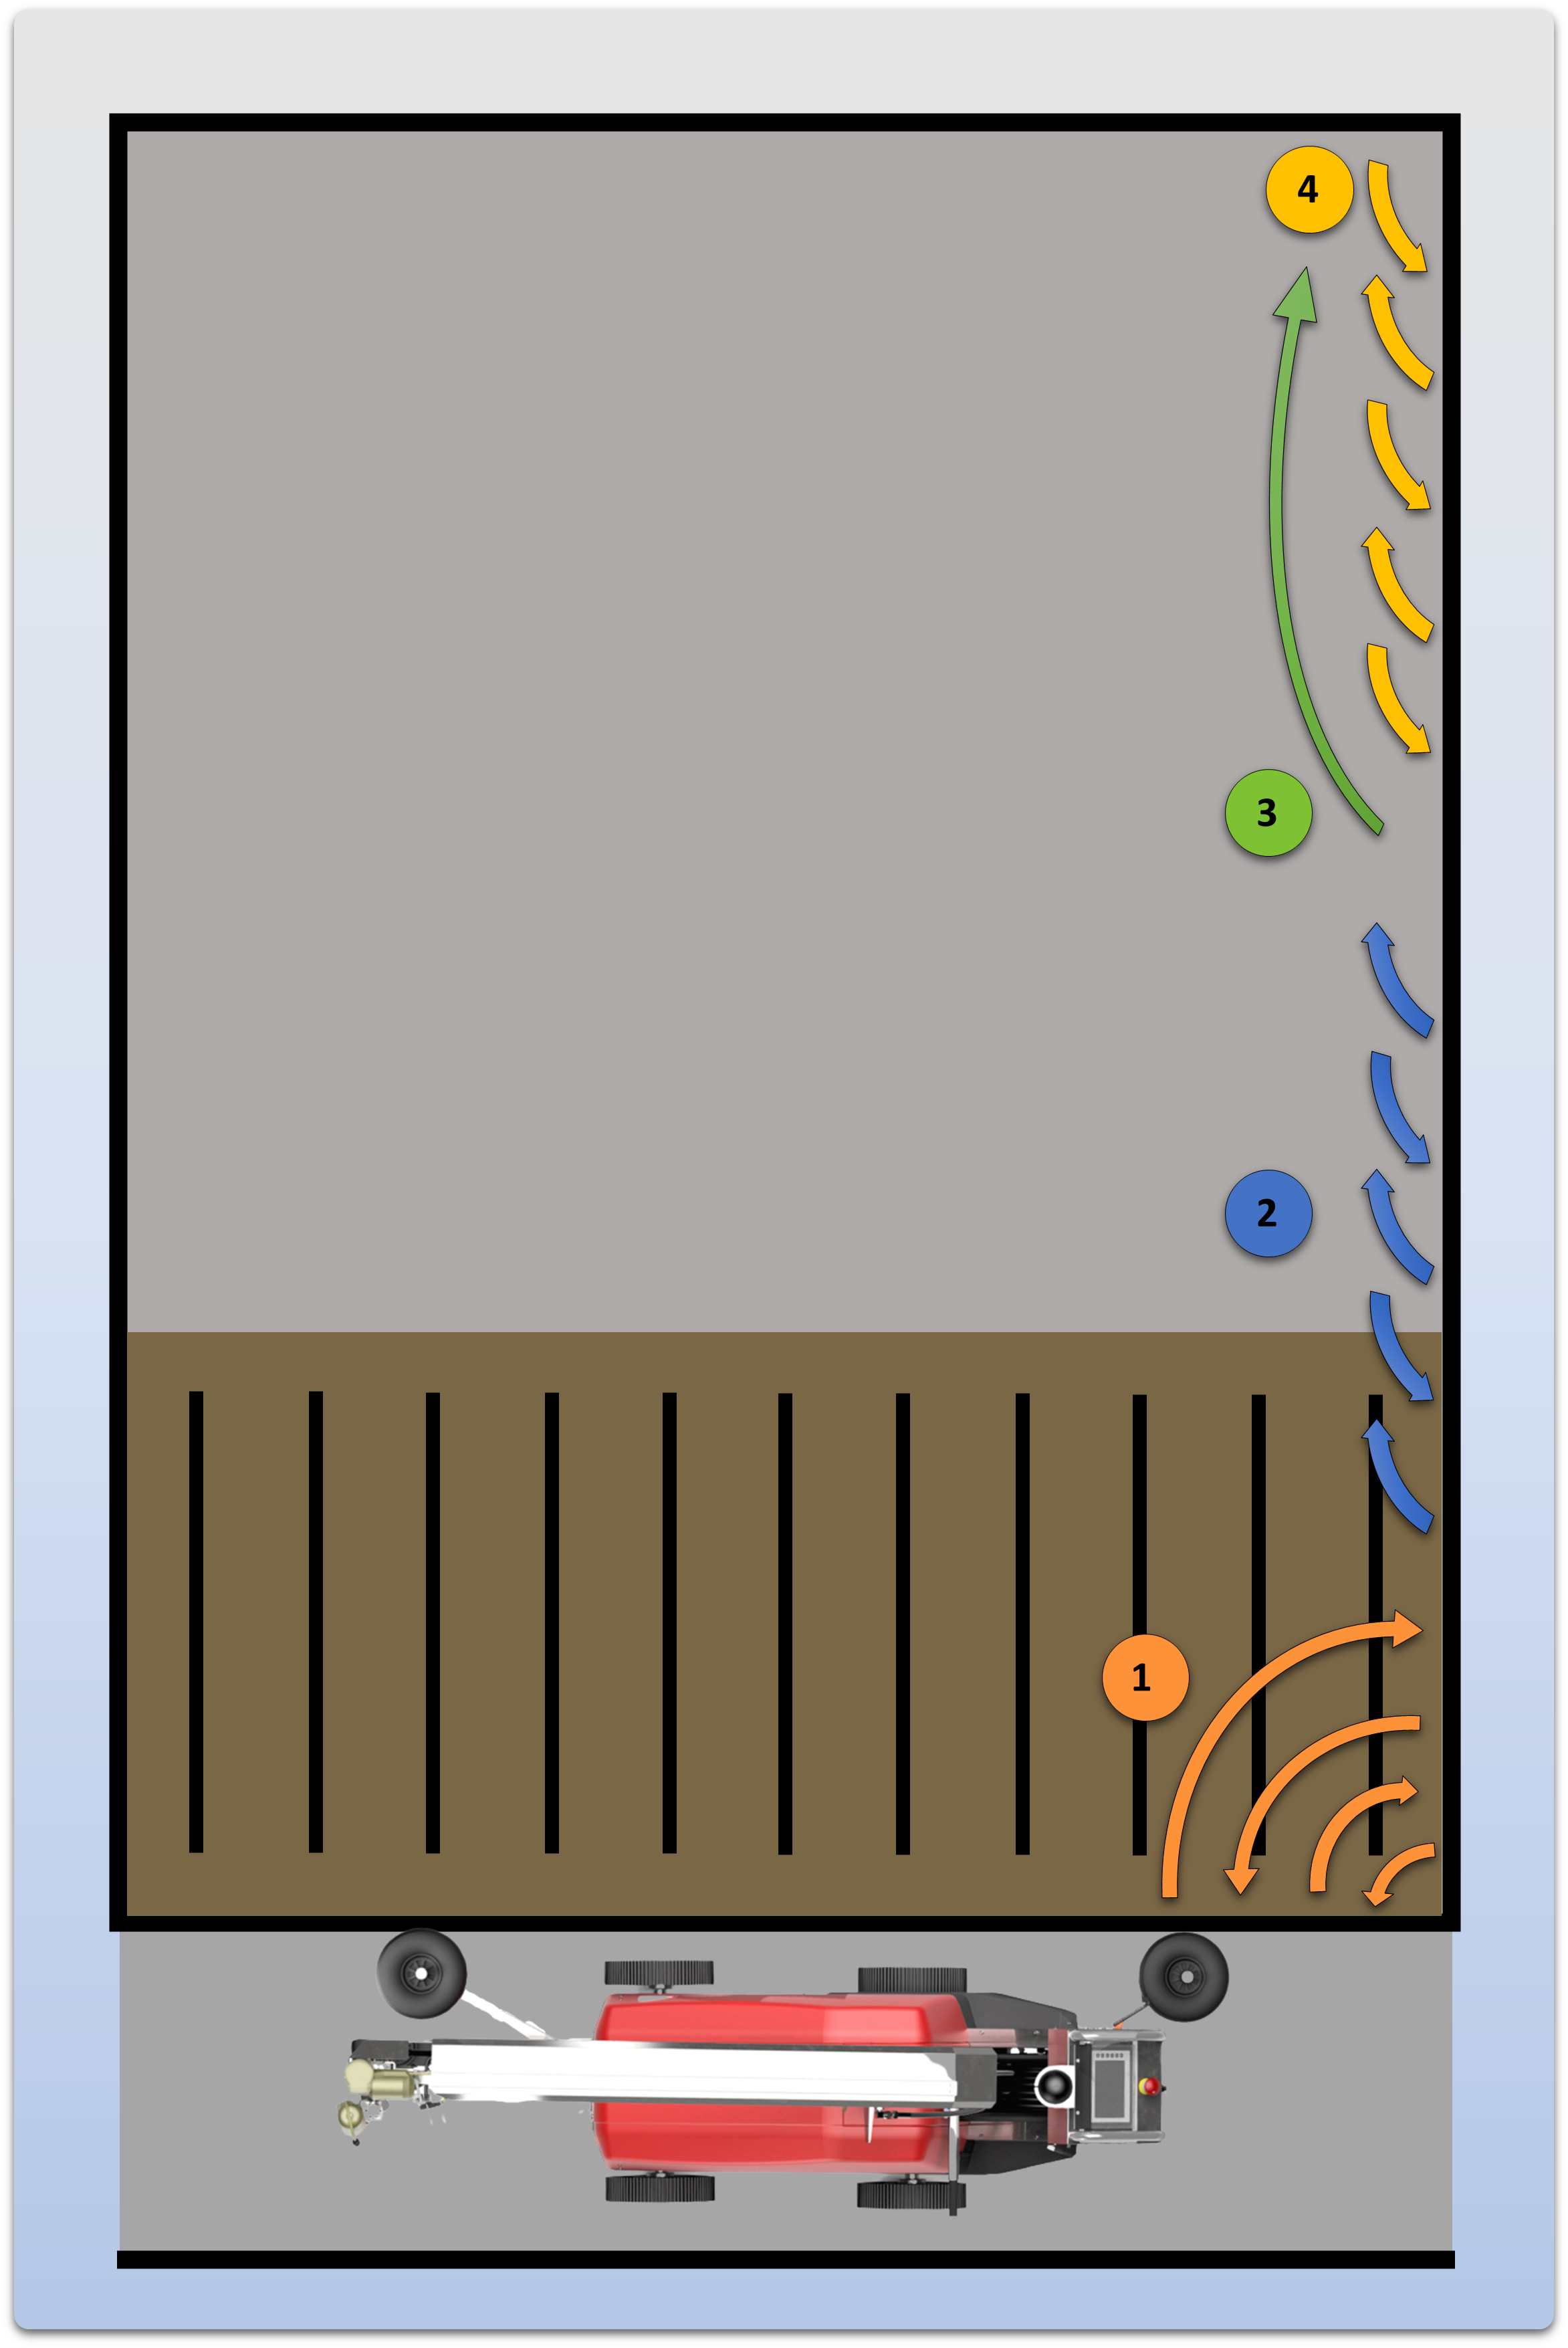
For a wall program, start from the marker and select a start position so that the tower is in the closest corner of the pen seen from the marker (if possible due to pipes). When selecting the start position, have in mind that you must be able to turn the tower into the pen. You might have to select a start position further back so you can turn the tower in to the pen, then driving the robot forward to the desired position. If you have a pipe that is unfortunately placed, you must work with the angles and range of motions that it gives you.
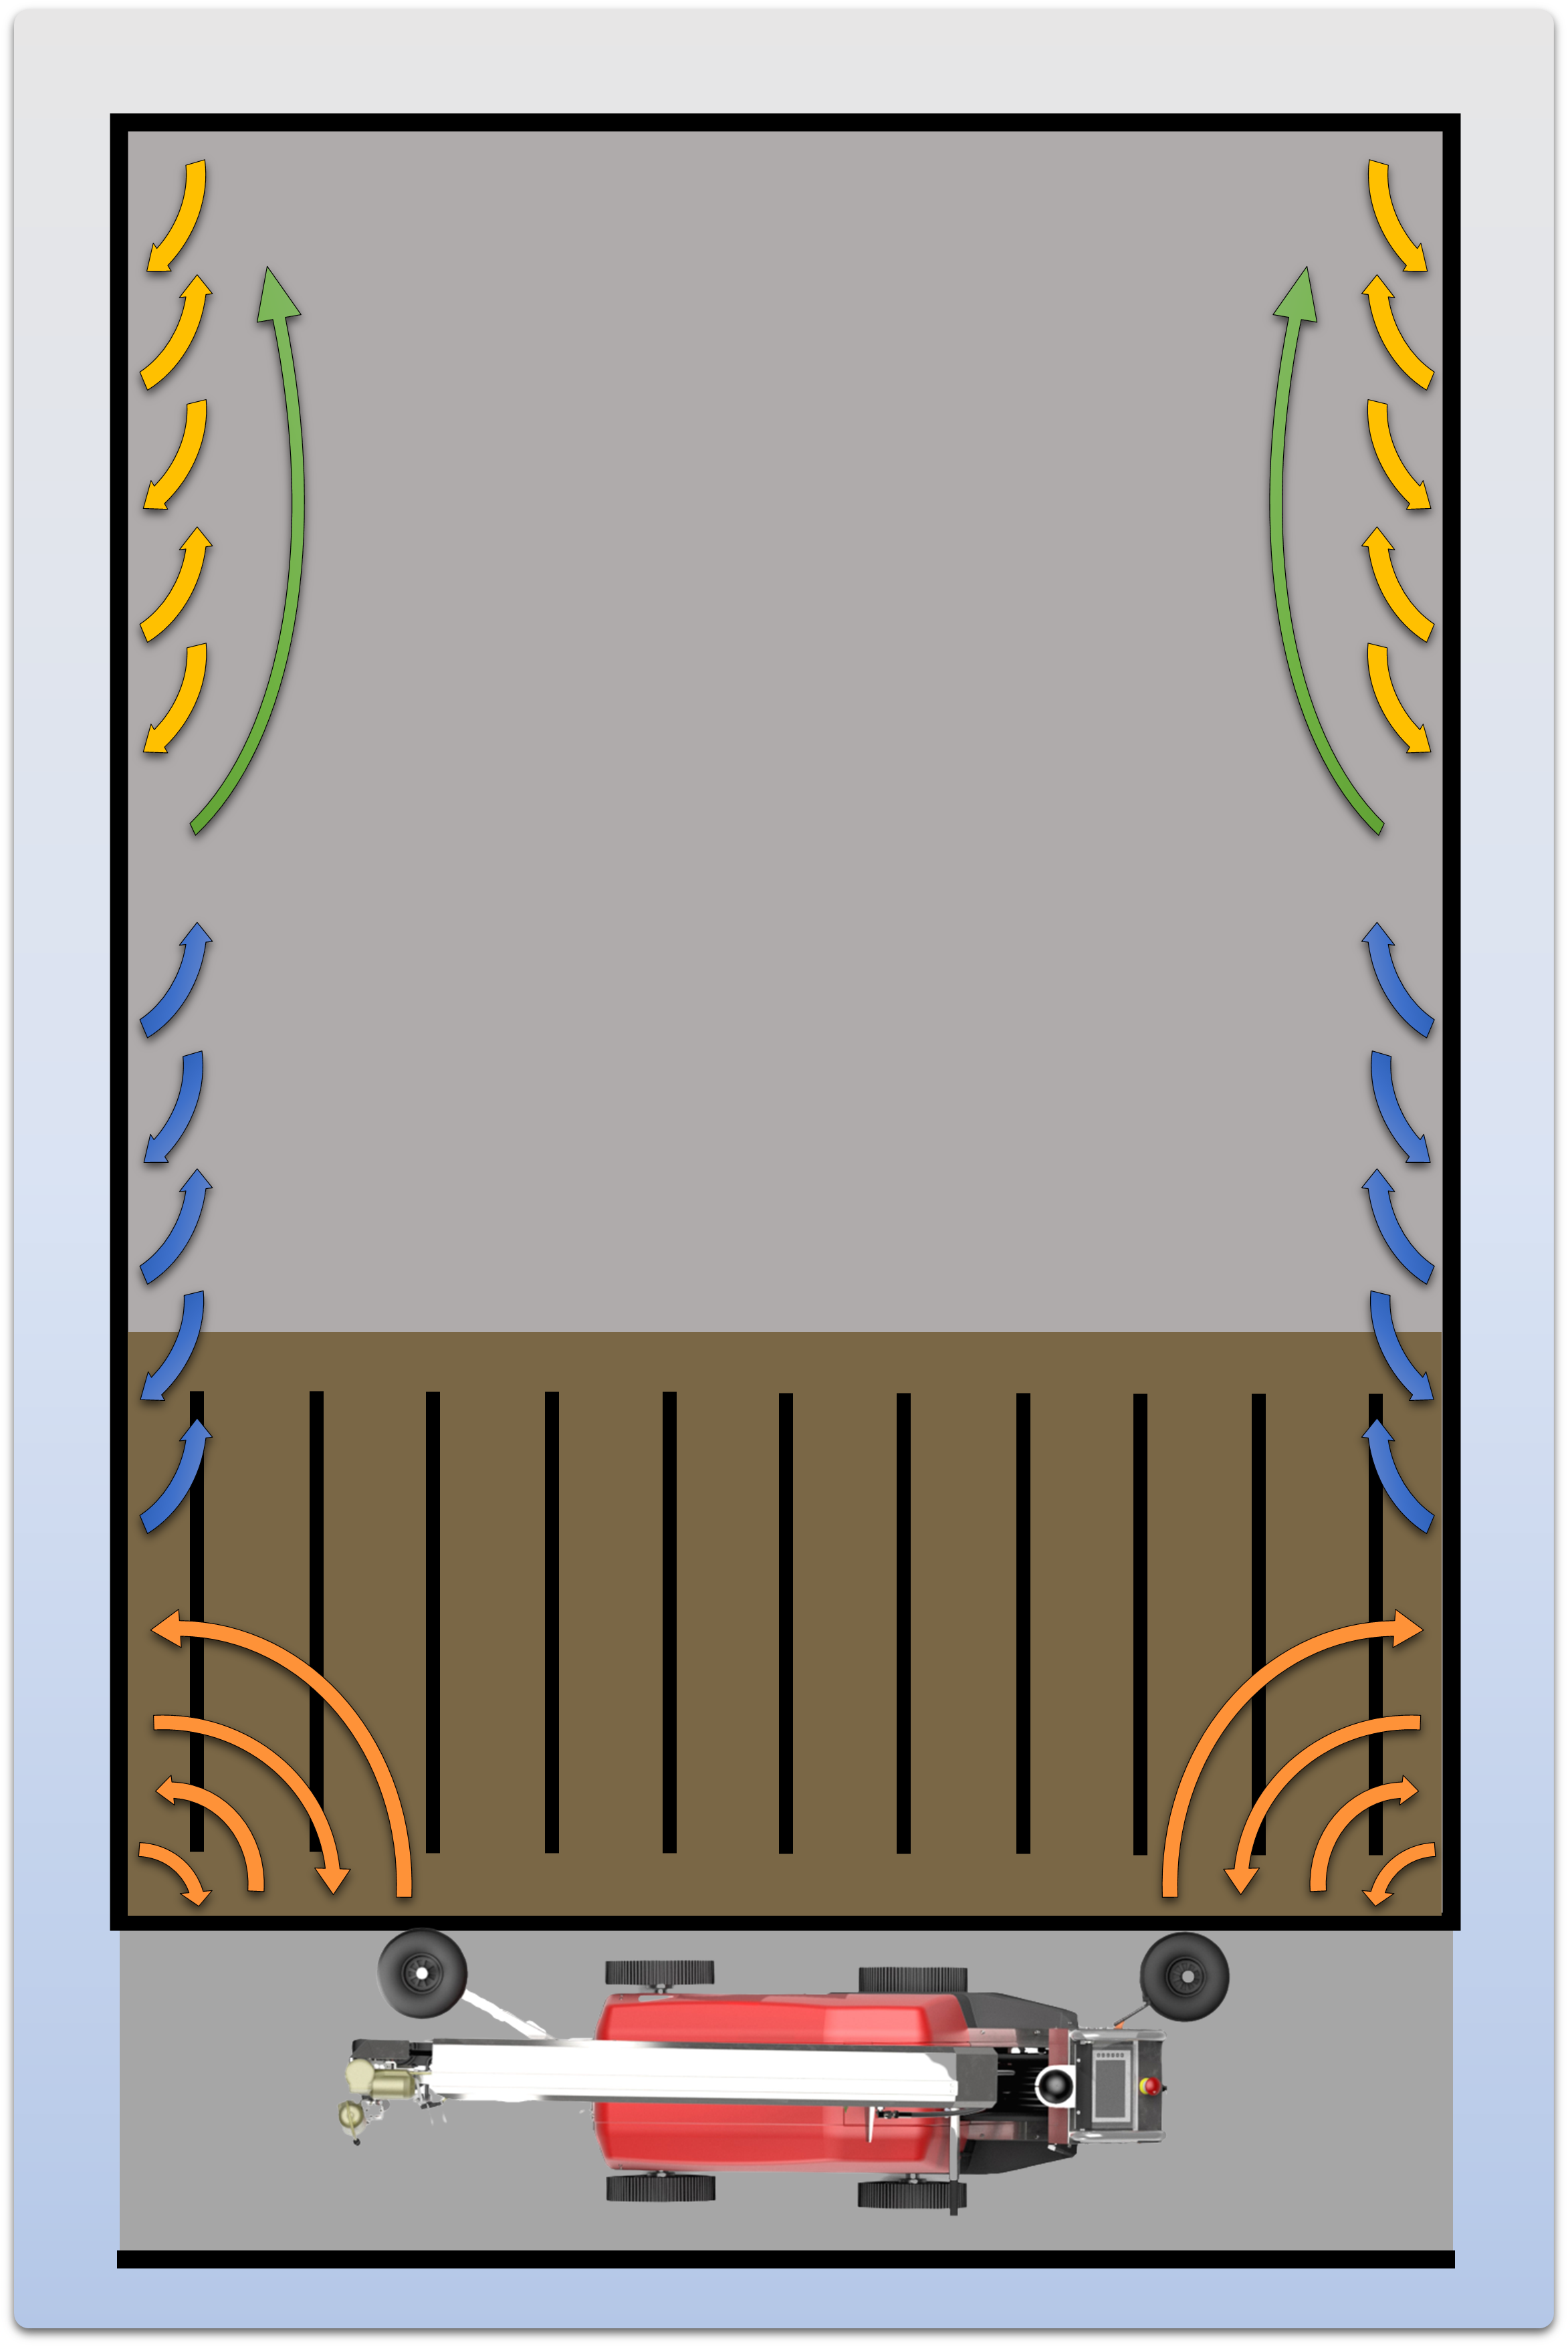
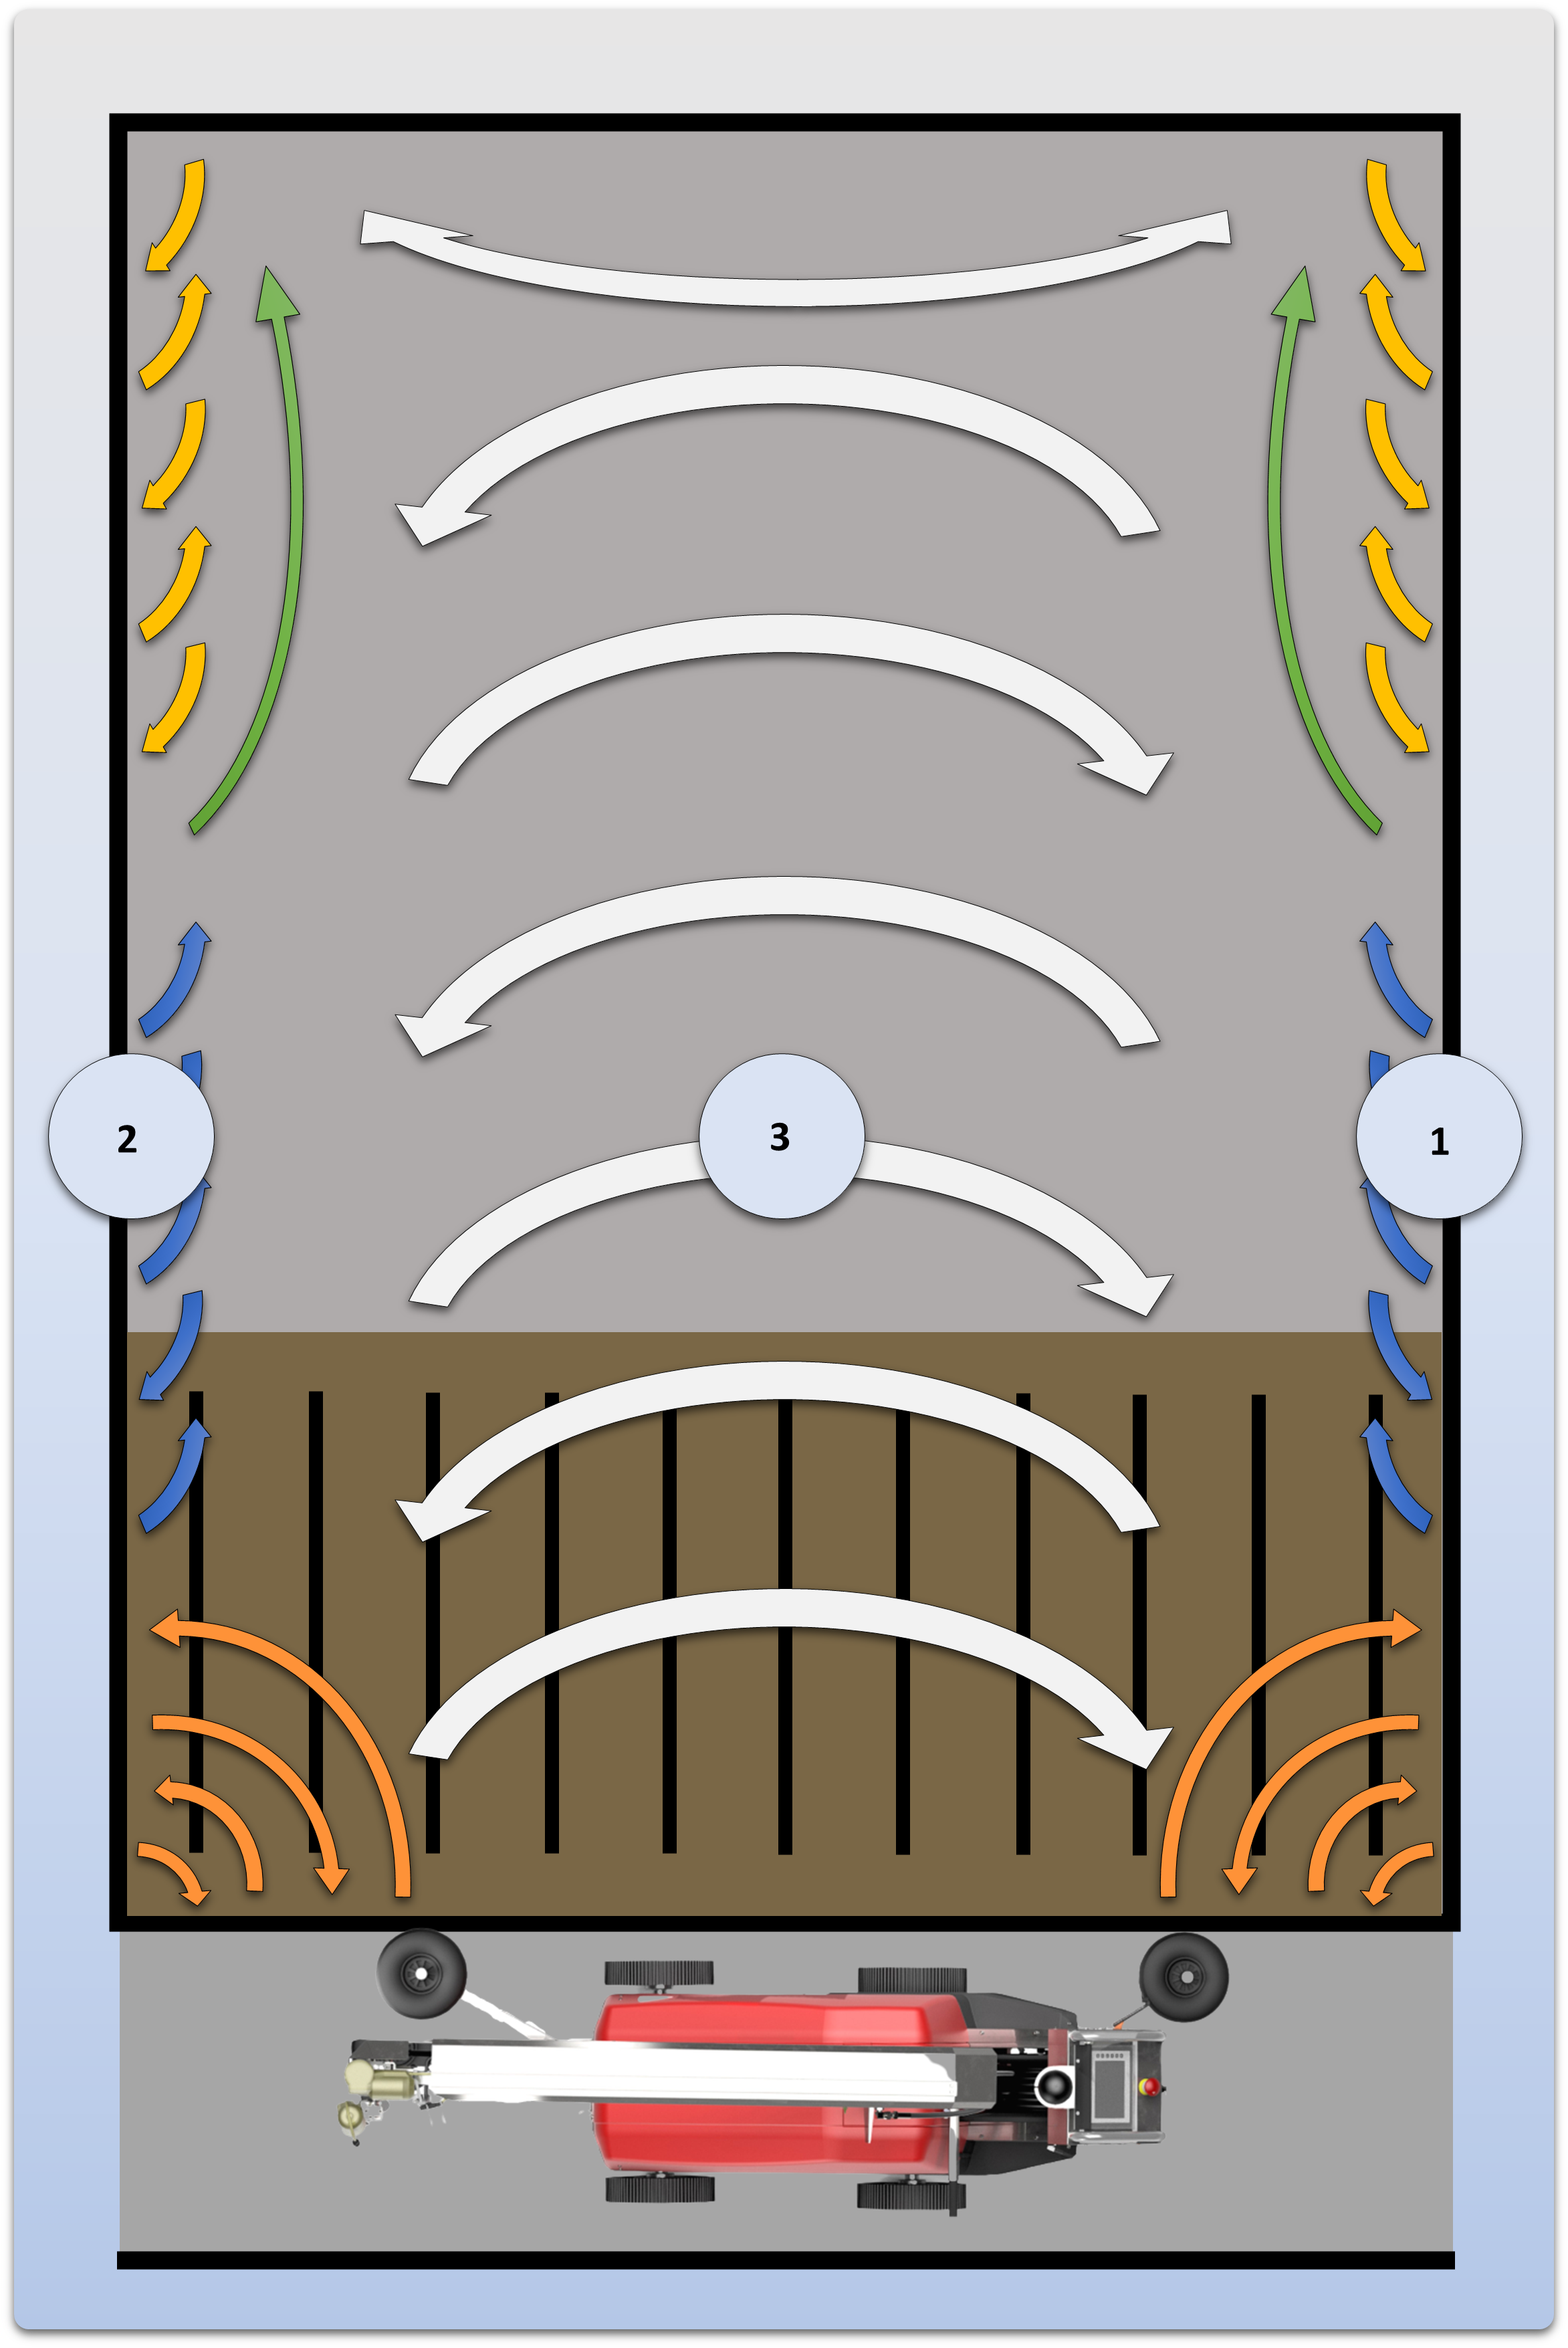
The illustrations below are basic movements for you to apply to any type of pen.
The movements shown in this instruction is general movements but can slightly vary from one pen to another pen.
Once you selected your start position and the joystick is shown on your screen, do the following steps:
The washing patterns
Overview